

Update Below!
Last summer, my town enacted a law banning plastic bags. We can still buy a paper bag from the grocery store for a nickel but the point of the law is to encourage us to bring our own from home. Every store now sells reusable bags. Most of these are the nylon variety and have an inner, tiny bag you can use to stuff the larger bag and store it in your purse. Some stores also sell plastic-coated, reusable bags. Having tried these two types, I found the nylon bags to be not strong enough for my needs and the plastic-coated bags are not washable. If you wash them, the plastic delaminates and they look awful and fall apart. Because you really should wash your reusable bags at least once a month, to prevent bacteria growth, I decided to try some cloth bags. I found one I love at Trader Joe's, but it cost $25. I bought two and then realized the bag itself would not be hard to make. One day I was in Joann's Fabric store and found some $5 a yard fabric in the home decorator department that looked and felt similar to the canvas-type cloth used in the TJ's bag! And so, VOILA! I made my own bags! Here is a tutorial so you can also make your own. With fabric being $5 a yard, this means the cost of each bag is a bit more than $5! Please buy one and a half yard of fabric to make one bag and follow these directions. I use my serger a lot in this tutorial. If you do not have a serger, you can use a zigzag stitch to replicate as best you can the serging. All seam allowances are 1/4 inch unless mentioned.
1. These will be your straps. I cut mine 4.5 inches by the width of the fabric. My fabric was 46" wide. When completed, this created 2 inch wide straps by 46 inches. If you use fabric that is not as wide, be aware that your straps will be a bit shorter than mine.

2. The main part of the bag is 10 inches by the width of the fabric.
This will create two pieces for the body when you cut in half (later in directions).

3. The bottom panel is 8 inches by the width of the fabric.
This will create two bottom panels.

4. You are going to cut two pocket pieces at 7 inches by 9 inches.

5. Now, we are going to make the straps. Iron them in half, wrong sides together.


6. Sew them closed with a 1/4 inch seam.

7. Now you are going to turn them right side out. I have this amazing Dritz tool called the Quick Turn. I got it at Joann's, but they also sell them online. This tool is a must-have if you make straps.

It consists of three tubes, each with it's own dowel.

You put the tube in the fabric tube. I used the big tube to turn this strap.

You put the plastic tube about 2+ inches inside the fabric tube and then take your towel and start gently pushing the fabric inside the tube.
 |
Push, push, push (gently!)

Now, start easing the plastic tube out as you continue to gently push the dowel up and the strap will be turned. It was very hard for me to picture how this worked before I bought it but I took my sewing teacher's word for it that I needed this tool and got it and figured it out! If you need help, search youtube. There are videos!

It just works!

It's a miracle! Do this for both straps.

8. Iron flat your straps. Doesn't matter where the seam goes but you can put it in the middle or side, for neatness. I prefer my seam to be on one side. How I achieve this is to first iron
it flat as you see below, with seam in middle. This opens the seam up
and then I can more easily fold it in half at seam and iron it again.


9. Topstitch your straps. You do not need to worry about the ends. They will be enclosed in the bag.

See? So neat and tidy and purty! Now you should have two straps.

10. Now, you are going to take you bag's main body piece and cut it in half in the middle of the width, so you now have two rectangles of same size. In my case, this was two 10 X 23 rectangles. Cut like so:

Set them aside.
11. Now, take one pocket pieces and serge the top, fold then each down an inch and top stitch. This will be the top of your pocket. Then, serge all the way around the three other sides. Iron flat. Repeat for other pocket.


12. Iron one of your body pieces in half so that when you open them up there is a line down the middle. Do same with the pocket pieces. Now, you can line one pocket up with the body piece by using the iron marks. Pocket is going to rest at bottom hem of this body piece.

Pay attention to your fabric and make sure the design will be right. Mine is lollipops so I wanted them all to stand UP.

Pin your pockets down on side seams.

Sew the sides of pockets to bag body.

13. Hem the top of the body piece by serging it and then folding it down one inch, stitch and topstitch.

14. . Now, take one strap and lay it over this pocket side seam. Align end of strap with bottom of pocket and body piece.
Take the strap up and around and then lay it down on the other side of the pocket. The strap will slightly cover the pocket enough to hid the pocket's seam. If you do not have a serger, you don't need to worry about pocket side seams since they will be enclosed behind the straps. Your bag should look like this after you pin the strap in place. Make sure the curve of the strap is nice so that it will lay flat on your shoulder when complete.

See how my strap curves nicely? Yours should, too.

Sew the strap into place from bottom of body piece to top, turn your needle 45 degrees, sew across the strap, turn your needle 45 degrees again and sew back down the other side of the strap. Repeat on other side of this strap. Repeat the whole thing for the other half of the bag. Your straps are now sewn down on both sides of straps onto the body.
15. Now, lay your bottom piece over your body piece like so.

I serged the two together but you can also sew and then zig zag the seam.

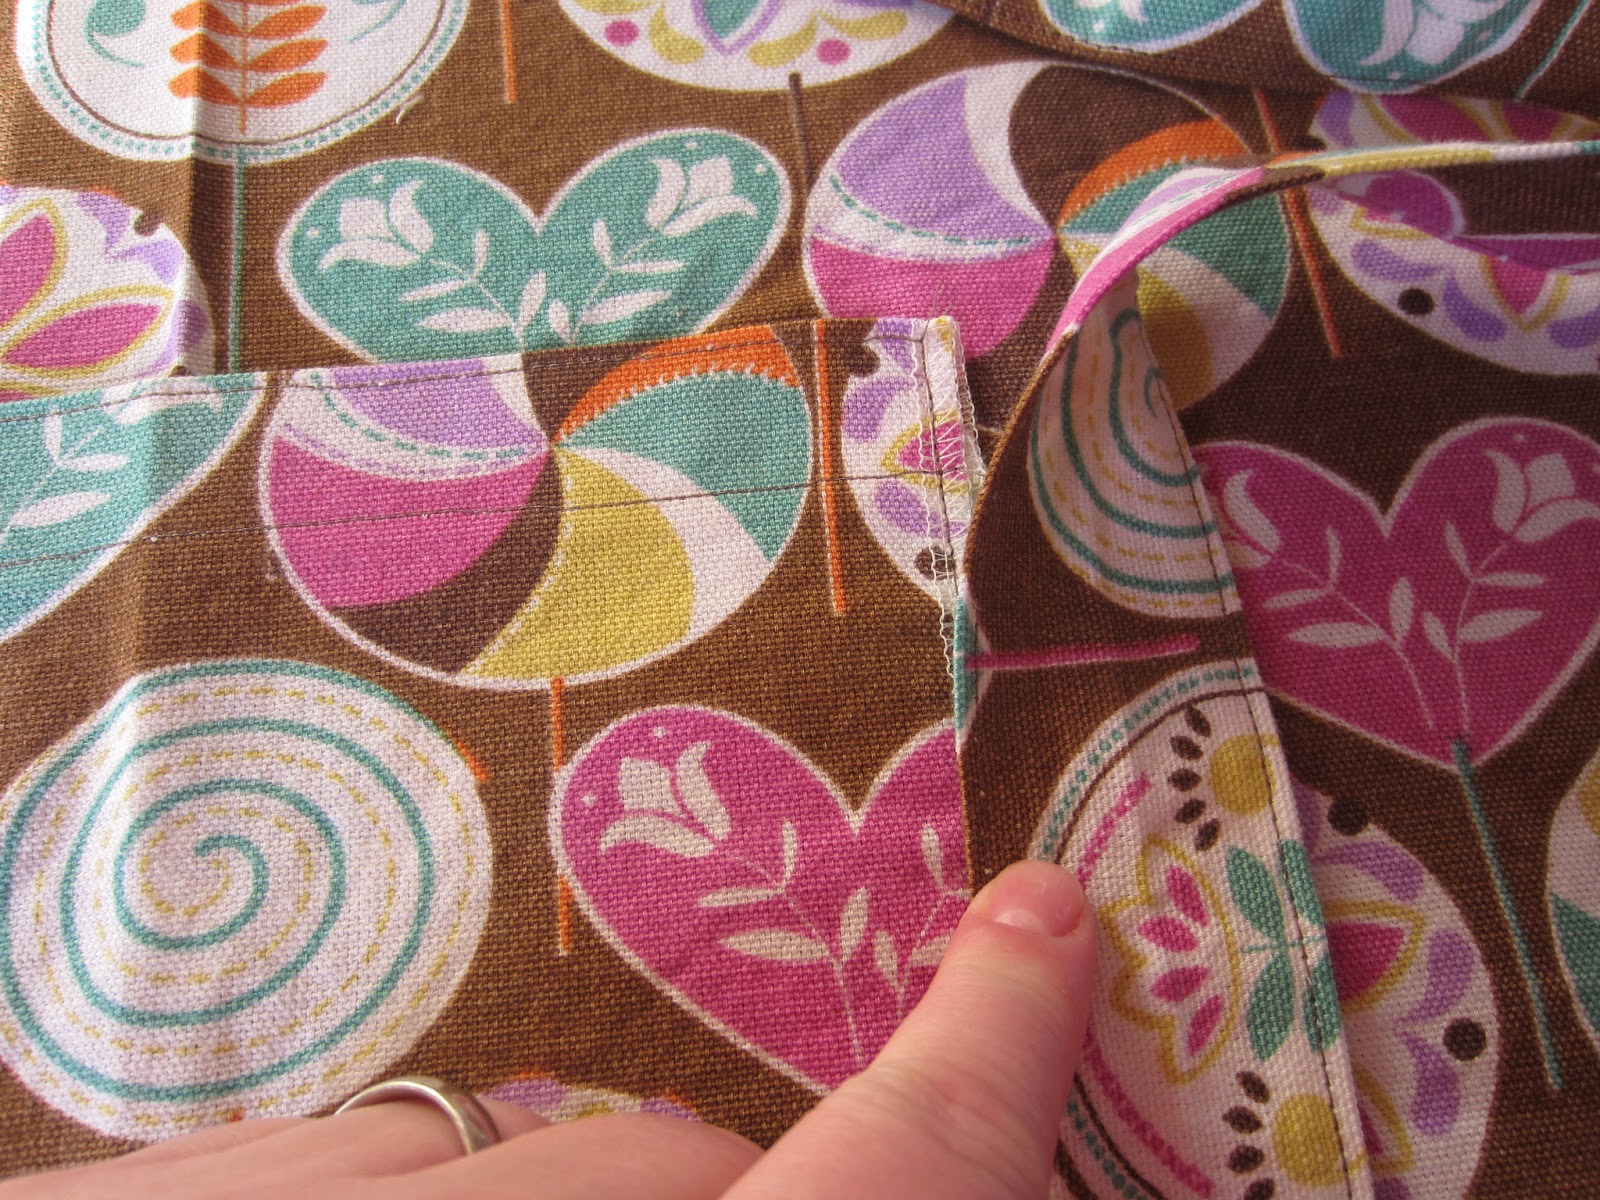
Then, turn the bag and iron and topstitch this seam. So, now your bottom piece is topstitched neatly. Here is a closeup of where the strap and pocket meet the bottom piece.

This is another closeup to show you how I ironed the serging down before I topstitched so the serging would be inside the topstitching. Repeat for other side of bag.

This is now what each piece of your bag looks like.

16. Now, line your two pieces together, right sides together, matching up straps and side seams. Sew sides and bottom. This seam should have a half inch seam allowance.

This is the one half inch seam allowance.

Serge sides and then serge bottom.

I like to enclose the serging tail by folding the seam over, as seen below, with the serger tail inside, and doing a zigzag over just that part of the seam. I do lock stitch, zigzag down, zigzag back, then lock stitch again. If you do not have a lock stitch, finish this part of the bag as you see fit so that the serger tail does not come undone.


For bottom corners, I do something similar.

17. The bottom of this bag is squared off. This is how you achieve this effect. Turn your bag inside out.

Fold the corner down like this, towards the side seam. Match the point of the corner to the seam between the bottom and body, matching point to side.

Iron flat.

This is what it looks like now. The iron leaves a nice line.

Stitch across this line. I go over this seam twice, for strength. Again, do a lock stitch of whatever you do to finish a stitch so that it does not come undone later.

Repeat on both sides.

Your corners now look like this.

And when you turn your bag right side out, you have squared off corners!


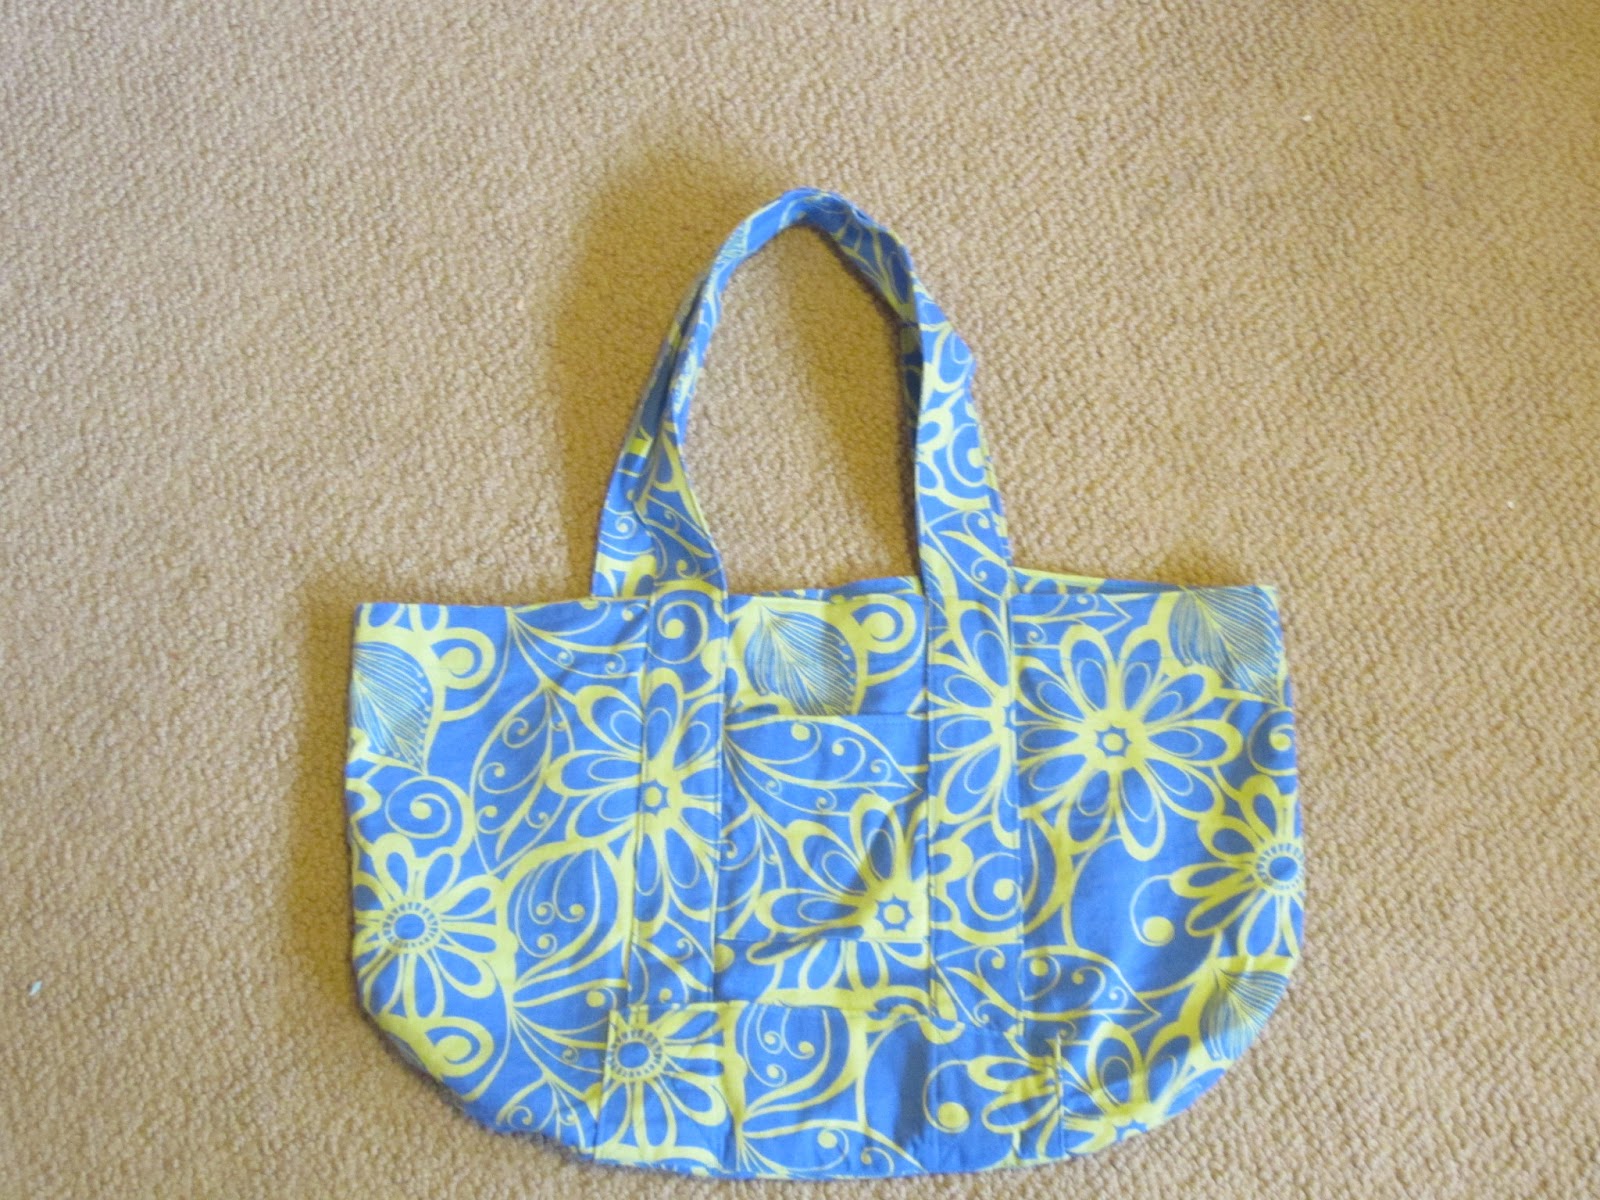
Iron your fun bag nicely. You are all done!

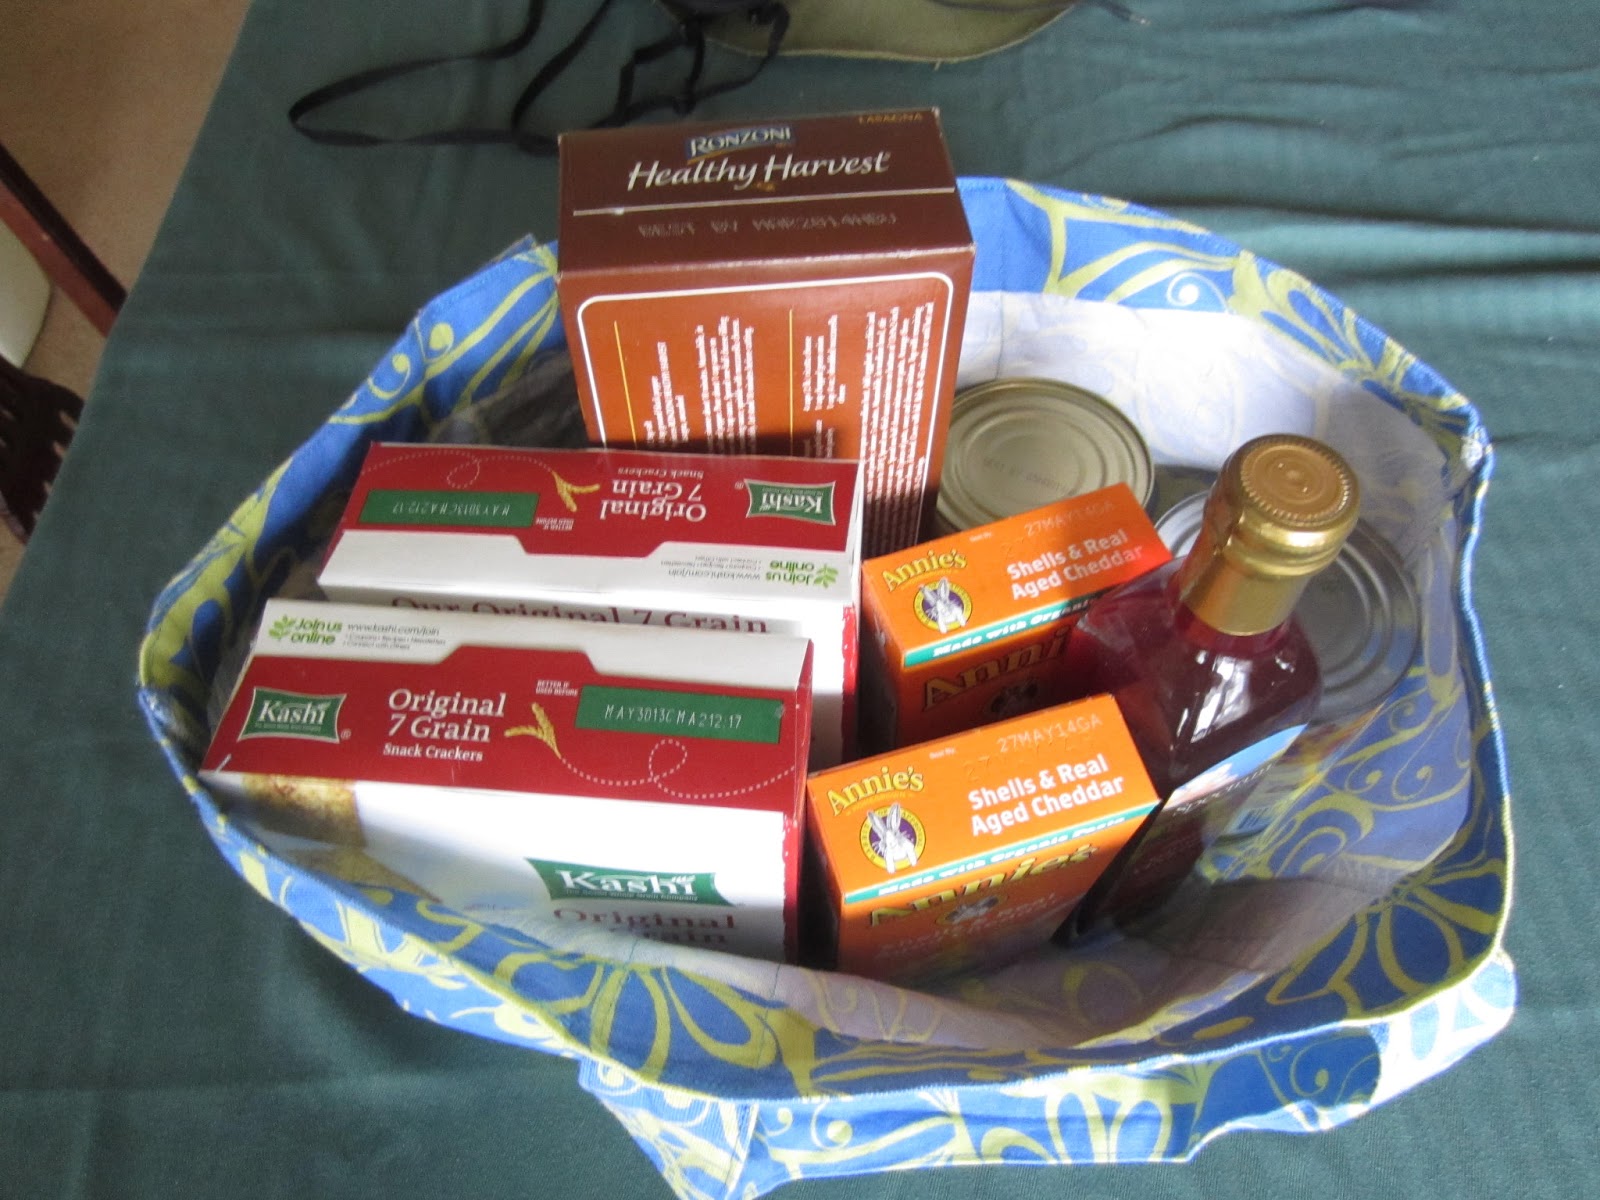
I purpose made this bag not very tall. When it is full of food, it is about 10 inches tall and can hold quite a lot. As you can see below, I can easily hold several cans and bottles. It is not tall enough for a lot of wine bottles to stand, but they can be laying down in the bag. I prefer this anyway as it makes the bag easier to carry. I made this bag to these measurements to suit my purposes. Most other bags I found were taller than I wanted and not wide enough. Please fiddle around with the measurements and create a bag your own size. Share your pics! You can send them to the Facebook page, link to the left.
Pocket is perfect for free stickers our store gives to kids, unused coupons, etc.

Please wash your bag with care. The type of fabric I used calls for cold wash, air dry.
Update:
I decided to make a second size and used some new construction methods. So, please read further for an alternative bag to make.
I decided it would be nice to have a taller bag. For this bag, you will cut your straps the same, 4.5 inches by the width of the fabric. For the body, I cut each panel 12 inches by the width. My width is 42 inches. Cut in half, each body panel will be 12X21 inches. For this larger size, cut the bottom panels 8 inches by width. Cut in half you have two bottom panels, each 8X21.
You can now sew the bag as above. When you get done with most of it and are ready to sew the two body pieces together, you may want to try French Seams! The bag below was made with French Seams for sides and bottom.

First of all, pin your bags wrong sides together.
Sew a 1/8th inch seam.

Trim any excess if you can.

Your seam should look nice and neat. Now, flip the bag right side out, iron, and sew another 1/8th inch seam all around. Be sure to contain the other seam within this seam so use your fingers to guide you to sew the first seam to the right of your needle at all times. You will be able to feel it.

Turn it back inside out and use the method in the first part of this tutorial to fold the corner of the bottom and iron. Now, sew that triangle. Should look like the picture above.

Flip it right side out and iron the fold of the bottom so it looks like the above picture! All done! This bag should be about 14" by 20"
Have fun!

Thank you for sharing with us. It's really help.
ReplyDelete