Showing posts with label Janome. Show all posts

Monday, January 21, 2013

New Pajamas and a new stitch trick

A few days ago, I noticed my oldest daughter's belly sticking out from pajamas obviously no longer long enough to cover it.  She has grown! Again!  So, time for some new pajamas.  I have wanted to make a pair from Ottobre 6/2009 for a while now and decided this weekend was the time.  I chose to use Michael Miller (Patty Young) cotton knits from my stash.  If you are a fabricaholic, you may recall that this first group of knits from Michael Miller and Patty Young are very soft but suffered horrible shrinkage.  Thus, I washed them about five times each, on warm, with warm dry, and made loose jammies.  If they shrink more, they will still fit or if she grows there is room to grow.  Win-win.


For binding, I used Robert Kaufman Laguna lycra knit from fabric.com. This lycra is a tad thin but works great for this purpose since you double it by folding.  I think it turned out pretty cute. She loves them, so that is what really matters. I made two pairs, but the other set, in lime green, did not photo very well with the yellow background of our family room!  Ottobre 6/2009 has three pajama patterns in it, if you are interested.  It has a long sleeve pajama set (which I used), a sleeveless short nightgown, and a long sleeve long nightgown.  A good issue.

 My daughter does not like tight waistbands nor anything rough against her body, so I made a mock yoga waistband, with elastic, instead of following Otto's directions for a simple waistband made from only elastic.  This is much softer.


Now, the other thing I did with this pattern is explore using my Janome MC5200 machine to sew overedge stitching.  If you do not have a coverstitch machine, this is one way you can get the look of coverstitching with knit fabrics.  This is the overedge stitch foot, foot C for Janome.  I do not know if this foot will work on other machines so you should look into this for your particular machine.  Overedge stitching weaves the thread back and forth on two little prongs (you can see one below next to the clear brush) and sews a binding, of sorts, down the edge of the seam. But,  I figured out that you can also use this foot to create a mock coverstitch.  Here is a tutorial on the classic use of this foot.


Here is what my stitching looks like from the outside.


This is what the stitches looks like from the inside.


And here is what it looks like during the process.


And here is the what, why, and how.   I sew two pieces of fabric together using a straight stitch. Then, instead of serging, I switch to the overedge stitch foot and stitch the flap of fabric down from the inside.  The straight seam is my right hand guide, so it lines up with the right side of the overedge foot.  So, the overedge foot sews down the flap of fabric that my serger would have serged. Make sense?  Doing the arm side seams was a struggle, but I did it. I did not even try the leg side seams.  The rest of the garment's seams are overedge stitched so it looks a bit like a pair of Hanna Andersson long johns now!  

I am pretty proud of myself.  This foot came standard with my Janome sewing machine. Until I get a coverstitch machine, this is a pretty neat trick!


Sunday, April 29, 2012

Patchwork Prism Quiltalong 2

Did you read my first post about the Patchwork Prism Quiltalong?  I was just thinking about trying to make a quilt for the first time and along comes this great project.  So, here I am!  I have now chosen my fabrics!   After panicking about it for a few days, I pulled out some of the fat quarter sets I  have won in the last year.   Did you know I have won three blog giveaways in the last year! What great luck I have! Anyway, among the three sets, I had won an Anna Maria Horner fat quarter set and a Pat Bravo Art Gallery set. Those two had some great fabrics which moved me deeply.  I decided to add some Kaffe Fassett because his work makes me swoon.  I ordered a few more fat quarters to round it all out, and here you have my choices!


Next step, finding the time to cut the shapes! I got the poster board to make my templates so now I just have to do it!  Stay tuned for more!


Sunday, April 22, 2012

Patwork Prism Quiltalong


I have been thinking about trying a quilt and along comes a quilt-a-long to tempt me!  I think might try it!  Sweet Diesel is hosting a quilt-a-long and giveaway at the blog, sassiness. It looks like a fun quilt-a-long, although I have never done one! But I love Anna Maria Horner and I think I will give it a go!  I might try a smaller version, though, for a wall hanging.  A first quilt should be small, right? 

First off, you can go to that link above to see the information, but you can also find the free project on the Janome website, here.  I own two Janome machines, so this is right up my alley.  I also found this great video where Anna Maria Horner, herself, tells you about the project. The rest of the information and directions are in the download and the Sweet Diesel website.

So, here I go, into my stash, looking for ideas.  I have several projects to finish sewing for clients and preparations for my new project, Little Miss Mingle, but then I am going to start the planning and preparations for this quilt-a-long.

Oh, but the new Ottobre just arrived!  Ah, so much sewing, so little time!


Happy sewing to you!

kathy

Tuesday, February 21, 2012

Shirring on knit fabric

For too long, I have been afraid of shirring.  So, of course, when I decide to actually try it, I decide to use cotton knit fabric. Jersey knit from Chez Ami, to be exact.  I don't know if shirring on knits is easier or harder than wovens, but what they hey.  Here I go.

So, first, I read Pink Fig's blog post on shirring . So many of her patterns involve shirring.  This very basic blog gave lots of great tips.  This is very helpful and my first few rows go great.  Wahoo!

However, later, I realize I need to add a row later and it wouldn't work!  Why, oh why? Why didn't it work?  Ack!  Bonk!  [that is the sound my mouth made, followed by the sound of my head hitting the desk]

So, what to do? Well, of course, I google everything I can on shirring and find some wonderful tutorials:

1. A great video! Gotta love a video!  Us crafty -types are visual learners, aren't we? So, here it is for you to click here. This was very helpful!!

2. Then, blog post from Pretty Ditty (great blog name!)  This one took it to another level and gave even more tips!

But, still, no go.  Sewing is happening, but it is not looking like the blog posts! What to do, what to do?  Well, if you run a sewing page on Facebook with over 500 members, you can ask there and get even more tips!  [do you belong?  Why not?  Join Handmade Dress Haven!  So, the sewing ladies on Facebook had even more tips, most importantly, if you get to the end of the bobbin, it might loosen up.  You might want to rewind!  That was a great tip.  Also, look at the bobbin cover for my Janome 5200:


Do you see the diagram? Notice where the thread is supposed to go. The stretchy elastic might not remain there during shirring.  This is a problem you can fix!

Also, I got several tips about how to thread the bobbin. Handwind it so it is not wound too tightly.  Or, use your machine to wind it so it is wound evenly, but not too tightly.  If it is not wound evenly, it can create tension problems. I decide to use my machine and give it a try. I press on the pedal slowly so it winds but not too quickly.  I hold the elastic between the spool and the bobbin so I can control how tightly it winds. I am not sure if this is a good idea, but it works! I achieve shirring enough to finish my garment!


This is Cecile, she is made using an Ottobre Pattern, from summer 2009 (3/2009).  She is made from Chez Ami jersey knit.  She is not complete.  I decided, at the last minute, to try fold over elastic. Now that I know how to shir, it is time to try something else new!  So, her neckline is incomplete.  But, she is pretty darn cute, regardless.  I will post anew when the FOE arrives!  Wahoo!


Sunday, February 19, 2012

Oh baby, I love you

I am doing a little top secret baby sewing right now, from Ottobre patterns.  Ottobre makes the sweetest baby patterns in the world!  Love love love!   I wish I could share, but I can't reveal it yet to the mama. 

But I can share how much I love my new sewing machine! So worth every penny I spent on her!  (yes, she is a female machine)


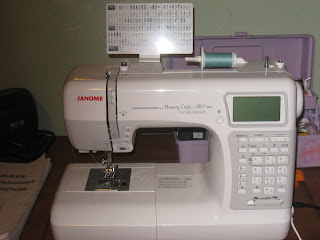
ere she is, in all her glory.  She doesn't really come with hearts on her.  She is the Janome Memorycraft 5200 and she is awesome!  I used to have a very old, very basic Singer, so having 201 utility and decorative stitches is a real experience!  She is calm and quiet and hums along nicely.  She does what she is told, perfectly every time.  She feels solid and well-made because she is solid and well-made!  I love her!!!!

I also have a Janome serger, a 1110DX, so I was already familiar with the brand. Made in Japan, these babies are work horses for the home sewist.   They are meant to last and meant to do everything from fine silk to denim and more.  Next time you are in the market for a new machine, check out your local Janome dealer!


Sunday, January 1, 2012

New Beginnings

 It has been over a month since I lasted posted.  In that time, my sewing machine, a 20 year old basic Singer, has given me a lot of grief.  Thus, began the path towards a new sewing machine.  I thought it would take me a while to save up the money to buy the one I wanted but my lovely husband threw some into the pot from his bonus and I was able to buy my dream machine, a Janome Memory Craft 5200.  


 Isn't she loverly!   


And she has all these stitches and more on the back of this card.  I am just thrilled with her capabilities and power and her quiet, strong motor.  A huge step.

So, to begin to use her, I decided to make a few of these Bit of Whimsy Mermae dolls.  I bought the pattern from her website and the pdf came right away.  It is a well-written pattern with lots of good hints.  I especially liked the Youtube video about embroidering the face.  It has been a while since I did any emberoidery!


So, here is the finished doll.  This is dolly #2.  The first doll was a rough draft, so to speak.  This one, I have been told, is not perfect  But, I think she came out pretty cute and her next mates will be even better.


I like the zigzag stitch feature on the new machine.  
It was very simple and easy to sew this bodice top.

Sewing her face together was not hard at all, thanks to the video on embroidery.  


The new machine has such lovely stitches, including this one we all think looks like waves.


So, look for more stuff happening in Kathy's sewing area starting today.


Happy New Year!