Last fall, I saw this tutorial over at Lil Blue Boo, for a pieced block dress, and bookmarked it. I wanted to try it! Not the blocking, but the piecing. It is just a cute look, not something we normally do here in this house. I like to try new techniques! But, I didn't want to buy the pattern she sells, only because I already own so many patterns. I figured I could wing it. And I did. Not only did I wing it, I barely even pinned it!! And it was almost entirely made on my serger. This dress is that easy to make!
Here is how I did it.
Part A - The skirt
First, buy a tshirt or find one in your closet. Here are two Lego Friends tees I bought, one from Zulily and one from a friend.
Next, find the fabric you want to use for the pieces. In this case, I had a rainbow of old Hanna Andersson tees I needed to upcycle. They have served me well for several years now but, each one having at least one stain, it was time for them to move on. Since the fabric is just too nice to turn these into rags, into the upcycle-me bin they went!
Aren't they pretty? It's a rainbow!!
First, I went through each tee and cut off the unstained portions. You can do this with any old knit items you own. Just cut off the stained parts and keep the good parts for future sewing projects. In this case, all the tops had stains that I could not get out.
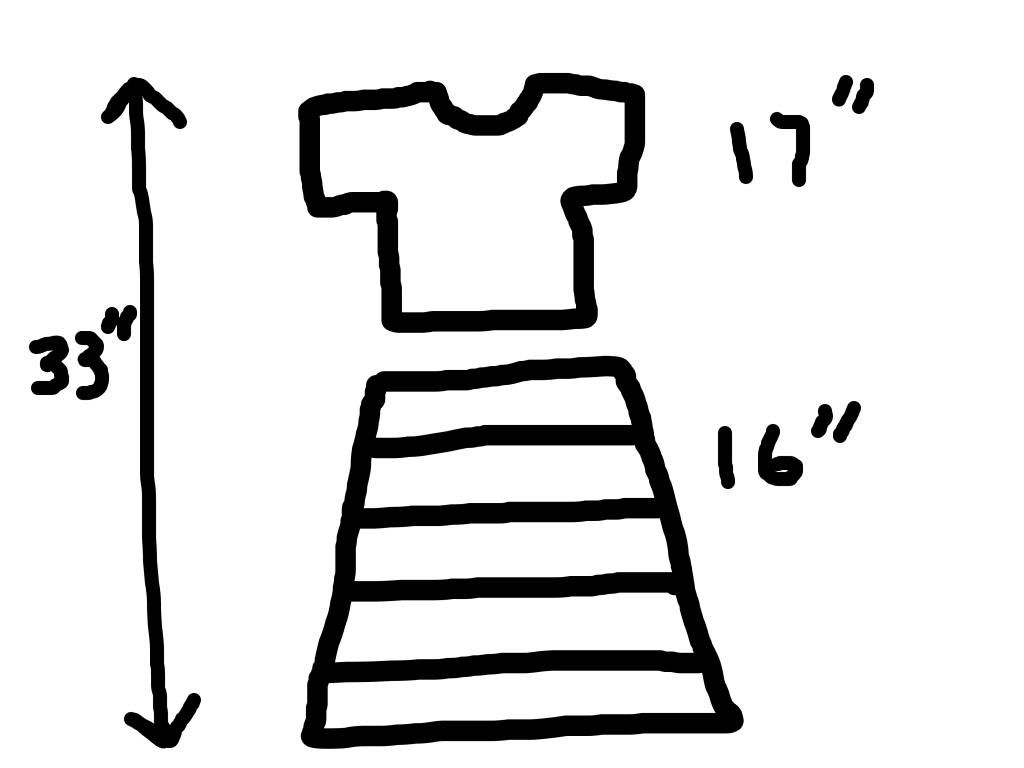
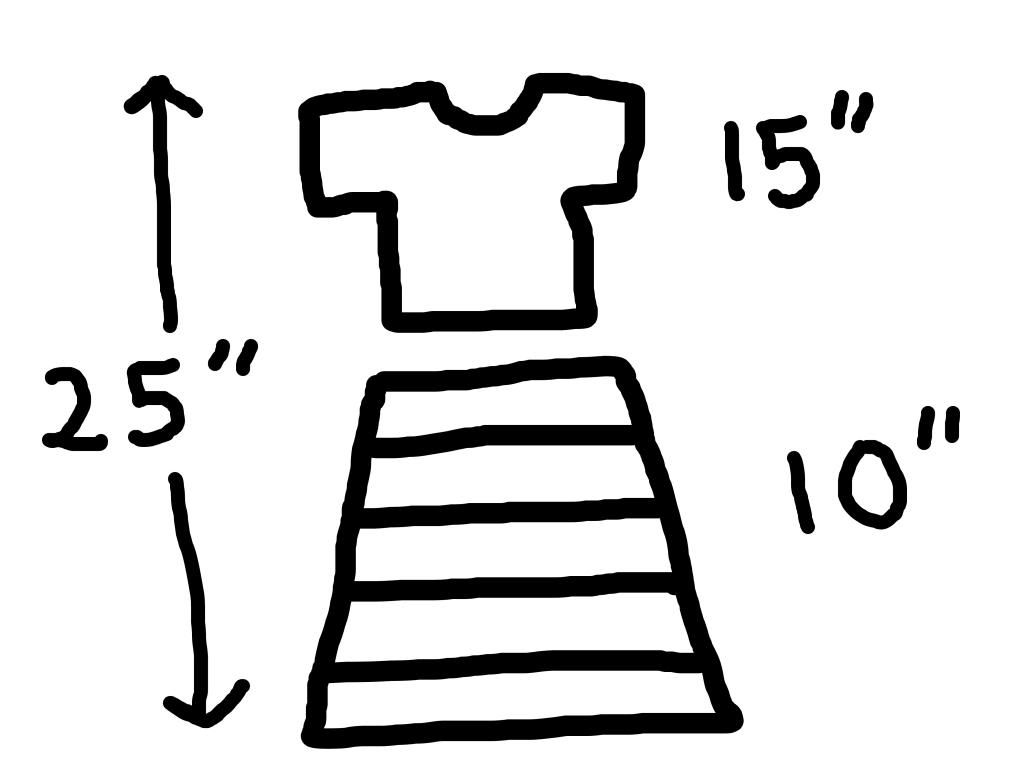
Now is the time for some math. You are going to want to figure out your total length (shoulder to where you want the skirt to fall) and then figure out where you want to cut off the tee. The total length minus the tee length is your skirt length.
Here are big girl's numbers:
Here are little girl's numbers:
You are going to want your skirt strips to be wider than the tee, so you can angle it A-line. So, grownup items work great for upcycling into children's items. My tees are wider than the girl's tees, so this was no problem for me. If you need measurements, take the waist of your tee, laying flat, and make your strips four inches wider on both sides. So, a 13 inch waist tee would need 21 inch-wide strips.
Because I have five strips of fabric, I cut five 2 inch strips for the little girl's dress and three 3" strips plus two 4" strips for the big girl's dress. Basically, take the total length you want your skirt to be and cut strips of fabric that will equal that length. For each additional piece you add to the dress you will
need to add a 1/2″ to your pattern length to account for the seams.
Now, center your tee on top of your strips, like below:
I want the skirt to be A-line, so I measure 3/8th of an inch off the edge of the tee (you want good seam allowance measurement here) and then angle my ruler a bit. Because I centered the tee, I just angle the rule to the bottom edge and both of my skirts will have the same width at the bottom.
Voila
Now, I serge the skirt pieces with wrong sides together. Keep your skirt laid out on your work table and take one piece at a time. Make sure wrong sides are together when you serge, so the serging shows. You can also do a rolled edge. They both look nice and are trendy right now.
Work carefully, so you get the serging on the correct side! You don't need to cut anything off while serging so you can even disengage your cutter. I just used my cutting blade as a guide.
Here is one side, all done. Look so fun!
I used a rainbow of threads for my rainbow upcycle!
When you get both sides of the skirt done, pin them right sides together. The photo below shows me lining up the serged edges. I wanted them to go UP, so I lined them up that way and pinned then in place. I also want each strip to match nicely at the side seam.
Use your sewing machine to sew them sides together, then serge. You can serge on outside or inside. I chose to serge on inside, like the LilBlueBoo dress. After sides were done, I serged the hem. I normally do not like serged
edges. They look unfinished to me. But, for this dress, it seemed fun
to use this as a theme.
To finish the hem, leave a long tail on the serging. Then, use an
embroidery needle to thread your serger tail back through the serged
hem. That will secure it nicely.
To attach the skirt to the tee, put the tee inside the skirt, wrong sides together. Pin it in a few places, to keep it lined up, and serge the two parts together. Make sure you remove the pins as you serge!!
And here they are again. The girls love them. They are comfy and fun.
Next up, sleeves! Look for Part B on Thursday.


No comments:
Post a Comment