Around these parts, my girls love to wear soft headbands. They both have long hair and the soft headbands are a much more comfortable solution to hair control than the hard plastic or metal ones. We can buy a Scunci brand pack of them at the mall for a few bucks but it is much more fun to have them match one's clothing! Since I made some cotton knit tops for my oldest daughter to wear to school, I decided to make some headbands to match. I was very surprised to find not one tutorial on how to do this simple project, so I made one. Tomorrow, I will share the tops these cuties match. For now, enjoy the tutorial. This is a great way to use your knit scraps.
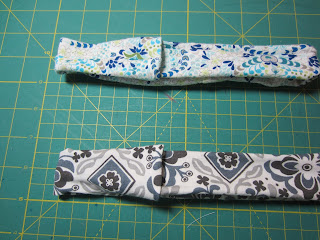
The finished project will look like this one, above. You are going to want to use cotton knit fabric with stretch to it. My fabrics are all part lycra and have good stretch and release. It is hard for me to tell you exactly what fabrics to buy but if they have some lycra and they stretch out and back and still look nice, you will be fine.
You will also need a ball point sewing machine needle for this project.
1. Our store-bought headbands are 9 inches long by 2.5 inches. We will be making 9 by 1.5 inch headbands. You can make yours any width you want. If you have a very young child, you might want to shorter the length.
2. Cut out two rectangles per headband.
Each rectangle should be 10 inches by 4 inches. I like to wing it on the seam allowance for things like this but if you like exact, then use a 1/2 inch seam allowance.
3. Right sides together, sew one end together on each headband.
Note: use stretch stitch or tight zig zag.
I am pointing to stretch stitch on my machine.
It looks like a lightning bolt. This stitch will give
your knit fabric some stretch but still have a tight seam.
A straight stitch might pop when your child uses her headband.
4. Fold in half length-wise and sew the length, right sides still together.
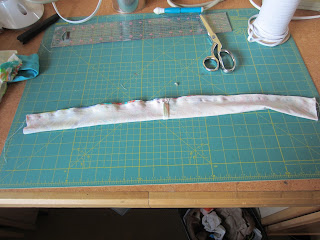
You should now have one long tube.
5. What do you use to turn tubes right side out? I use my Dritz Tube Turner!
(I wish that was a sponsored comment, but it is not! I just love this doohickey!)
Here's how it works.
You stick the tube in, use dowel to push a bit of fabric inside and then
you stand it up and pull fabric down.
Voila! Right side out tube!
6. You now have a 19 inch tube.
7. Take one side of your tube and fold fabric in 1/2 inch.
See both pics above for how that looks.
8. Stick the other end 1/2 inch inside the tube.
You now have one side folded in 1/2 inch and the other side laying in the tube 1/2 inch.
9. Sew a 1/2 inch square to contain this end.
Your headband is done!
10. Yay! You now have some nice headbands to match your handsewn clothing!
Tomorrow, I will share some of the clothing I made with the above fabrics and I will also let you know about the giveaway I am doing! I will be giving away some hard to find fabric! I've also been pattern testing and cannot wait to share about that!


I was looking for this! How did you know? Thank you!
ReplyDeleteBonito blog, gracias por compartir, me gusta.
ReplyDelete