
Welcome to post #2 in the Making your own patterns series. In this post, I will show you how to take a pattern and adjust it to fit a body that is not standard sizing. You might have a person who is a size 12 in the waist but 8 in height. She might need a 10 in length of bodice but 8 in length of skirt. So, what do you do? Here you go!!
First of all, take very good measurements. Measure chest circumference, waist circumference, from shoulder to waist, hip circumference, and waist to where you want hem to end. If your item has an empire or dropped waist, take that into account when you are measuring. Draw it out if it helps you. I prefer just to write it down, but drawing it out helps others a lot!
This might be hard to see, but here is the size chart for the Portabellopixie Claire pattern I use when I make a peasant dress. It only goes up to size 8. If you look closely, you can see that the waist sizes increase by increments of one half inch or three quarters of an inch. So I was able to size the pattern up pretty easily by taking good measurements. The person I am sewing for has a 30" chest and needs the dress to be 32" from shoulder to hem. This dress has a slightly empire waist and her waist measurement is also 30". Because this is a dress with elastic around neckline, her shoulder width will not matter much. The dress should still fit.

So, if you look closely at this picture, you can see I added the appropriate increments to increase the pattern to a size 12 to accommodate her chest circumference. I am keeping her shoulder to waist measurement in my head at the moment.

Another view.
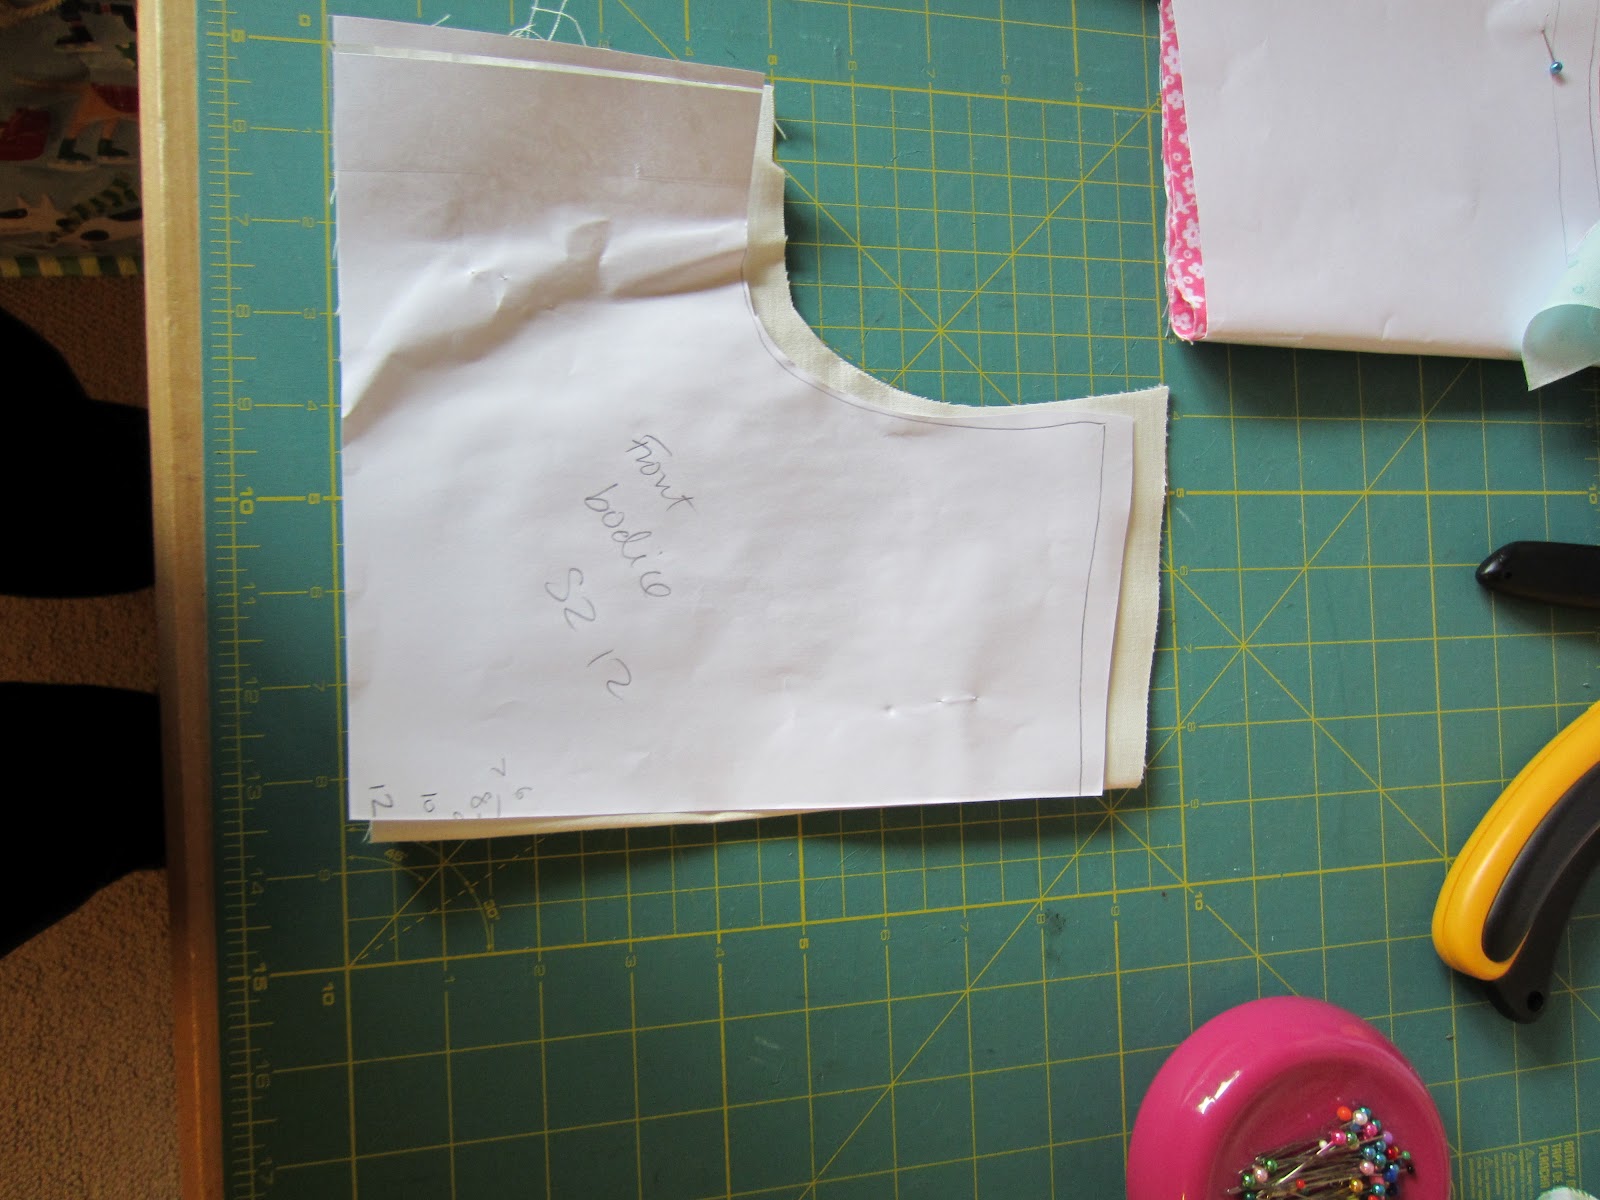
Closeup

Fast forward to the sleeves, front ruffle and sash being all done! Back and front are sewn together. This girl measures 10 inches from shoulder to waist and I have made sure it fill fit that by adjusting as I sew. In this case, I took a bit off the waist of the bodice before adding the sash, in order for it to be 10 inches from shoulder to waist. Voila!

This girl is 30 inches around and this waist will measure 32 inches. Since it has a sash she can tie in back to make it fit better, this should fit perfectly!!

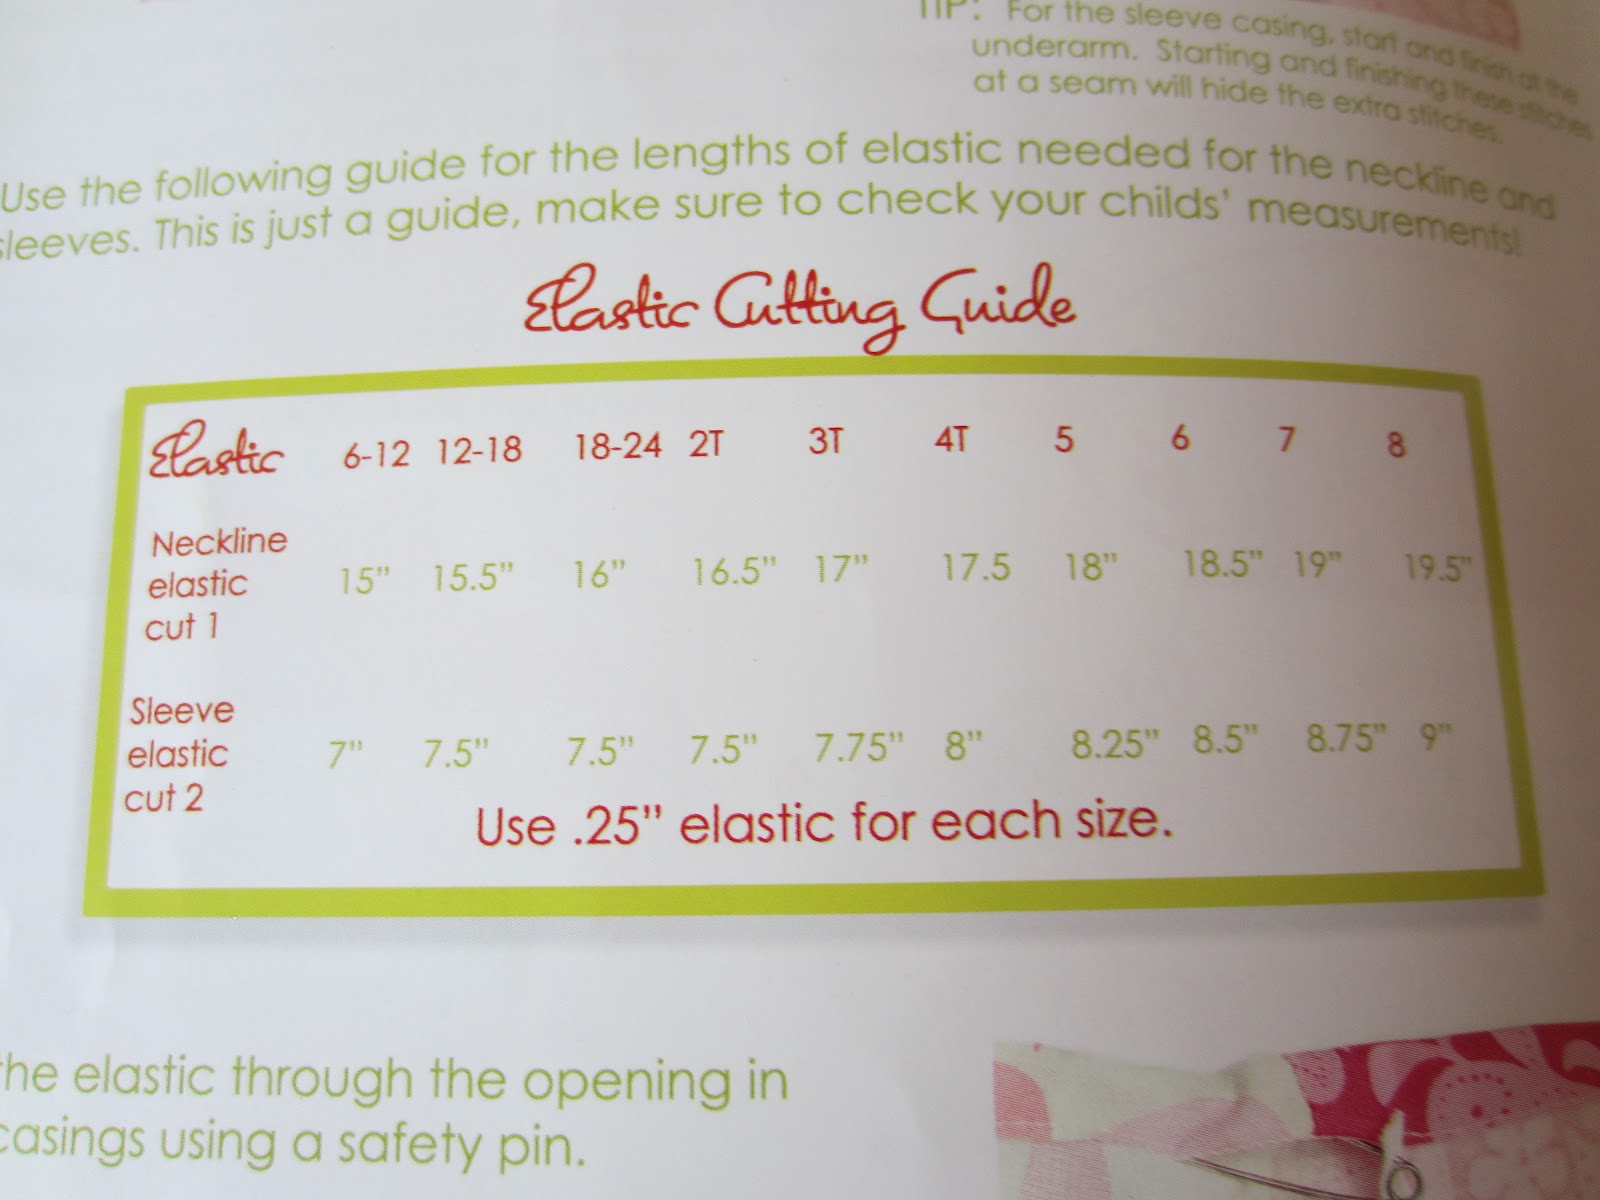
Now, for the elastic for the bodice neckline and sleeves. As you can see below, there is one half inch between sizes for neckline elastic and one quarter inch between sizes for sleeve elastic. So, it was easy to add up to what would be a size 12. Because I would rather this be slightly loose than snug, I went with size 12 for elastic sizing, as that is also her waist size.
Elastic is all cut and ready to go.

Now, on to creating the skirt. In this case, it is one piece with an attached ruffle. This Children at Play Parade Print measures 14 inches so I needed another 7 inches or so to get to the 21-22 inches I need for the skirt. I want the finished dress to measure 32 inches from shoulder to hem, and the bodice is 10 inches, so I need 21-22 inches. And that is how I cut my fabric!

All done!

Close up

Back view

Don't be afraid to play around with sizing on pdf patterns. Paper patterns will be harder to adjust since the sizing is less standardized. But, pdf patterns are usually pretty easy to adjust if you measure very carefully and write it all down, even draw it out. You can do it! There is no such thing as a standard human body, anyway, so this really helps you sew in a more tailored way.
Happy sewing!
I'm so happy you are doing these tutorials. My DD is very short in the torsal and very long in arms and legs. This will be a great help with her dresses this summer.
ReplyDeleteHappy Sewing!
Sheila Isbell