It's Happy Home Blog Tour Time! Happy Home is the new book Jennifer Paganelli, of Sisboom. It was co-authored by Dolin O-Shea. This is a fun book with a lot of easy to medium patterns, including cute pillows and decorative elements like a party banner, pretty aprons, stockings, and bedding items like a quilt, bed skirt, and even a lovely canopy! My girls are in love with the last one, so we may have to try it out soon! There are also patterns for accessories like pretty fabric-covered boxes, totes, bags, and a lovely hat, called The Broad Brim.
Here's my version of The Broad Brim:
That's me and yes that is as good a pic of me as you are going to get with that wee camera. I wish I had a nicer one!
Here is the finished hat. This is all made from Jennifer's Crazy Love line of fabric for Free Spirit. I love this line! Such pretty patterns and vibrant colors.
Now, for a review of the pattern. I felt this was a pretty easy pattern to follow but I had a hard time picturing how to do things. I am a visual learner and there are not a lot of graphics. That is my own problem, and not a ding on the pattern. I read each direction step several times before sewing and really only had to rip out seams once. I chose to leave off the casing for the shoe lace because I have a big head and I knew I would not need to tighten this hat. It fits a head 21.5-24 inches in circumference and my head is 24 inches! I did take pics of a few hints for people to try when they do this pattern.
Tip #1: cutting out a perfect circle. The top of the hat must be a perfect circle, so here is a tip. Make your pattern piece by folding a piece of tracing paper in fourths and cutting out a piece of pie. When you open it, it will be a perfect circle.
Now, do the same thing for the fabric. Pin the pattern piece and the fold and fold again, like this picture below:
Cut it out.
Open it up and you have a perfect circle!
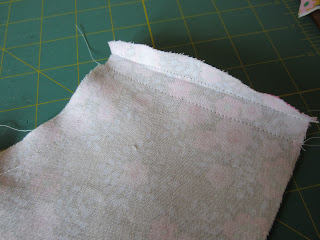
Tip #2: Trim the excess layers of interfacing before you sew parts together.
Tip #3: Use a lot of pins!!!
Tip #4: Every time you sew something wrong side out, turn it right side out and check how it looks before you move on.
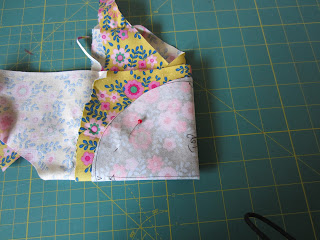
Tip #5: When it comes time to sew on the crown, you might need to unpin and make a size adjustment so it will fit well. (seen below, I had to take it in a half inch)
Tip #6: Make sure your hat looks good on the outside
and the inside!
And then enjoy!!


Great job Kathy! I want that hat!! lol
ReplyDeleteKathy my life changed when you introduced me to hand made Dress Haven. I just think the world of you and so grateful our paths crossed. Thanks for introducing me to a whole new world of likeminded peeps..The Hat is perfection!
ReplyDeleteI LOVE the hat...gotta try to make one of them! Great job!!! So cute!
ReplyDeleteAwesome, Kathy!! That's one of the projects I would love to make. Great fabric choices ~ so perfect for spring/summer.
ReplyDeleteLindsay