Showing posts with label tutorial. Show all posts

Tuesday, July 22, 2014

Free Twirl Skirt Tutorial - Sizes 2-14

Here is an easy way to make a circle skirt for a little girl.  This will be a very twirly skirt! 


free twirly skirt pattern


To start with, you have to make a circle for the top panel.

To achieve this, you need to measure the hips of your girl.  Then, you need to find the radius of your circle.  The equation to do that is hips+2 divided by 3.14 divided by 2=radius.   The width of your fabric will depend on how large you want the panels to be.  In this case, I wanted the final skirt to be 10-12 inches long so I made each panel 6 inches wide. 

Take your panel and fold and fold it again so you have a rectangle folded twice.  From the folded corner, measure your radius and mark it.  Get something circular to trace a circle of that radius.  Remember that radius is a straight line from the center to the circumference of a circle or sphere.

You can find your radius by measuring from the corner down that length on each side of the double folded corner.  Measure out that far into the fabric and mark.  That is your radius. Lay your circle template on top of that mark so it curves from one point to the other, thru the mark in the middle. 


Here is my example.


free skirt tutorial

I cut the top circle and then measured down 6 inches and cut another circle of same curvature.
I used my ruler to do this. I marked the fabric every inch or so and cut on those markings.


 free skirt tutorial

Now, to make the bottom panels.  Remember, they are 6 inches wide. To know how long to cut, you measure the bottom of the circle and times by two.  Cute two panels out for that width and length, in this case 6 inches wide by 36 inches long. 


This skirt is going to have two different fabrics on the bottom.  I cut two rectangles each 6" X 36".  The purple is for the waistband casing.  To make  the waistband casing, measure the inner circle.  Cut a rectangle 2.5 inches by this length, plus a one inch in length to account for seam allowance.
The purple, below, is for the waist.

free skirt tutorial
free skirt tutorial


 Time to add embellishments, if any.
free skirt tutorial


Next, sew the panels together into one big loop. Hem the bottom how you see fit: rolled hem, fold twice and sew, or serge and fold once and sew.  Then, gather the whole thing.  I recommend you try one of two methods for gathering: a) zig zag over fishing line, pin panels to upper tier, and pull on fishing line to gather; or b) sew two loose stitches, near the upper edge, pin panels ot upper tier, and pull on one stitch to gather.

Now, attach the ruffled lower panel to the bottom of the upper circle tier. 


free skirt tutorial

This is not as easy at it looks so go slow and work carefully. 


Next, finish the hem between the layers.

free skirt tutorial

 Iron and top stitch.


 To make the waist casing, fold the fabric in half, wrong sides together, and iron flat.  You will now have a 1.25" by waist length casing.   Sew this into a loop with a 1/2" seam allowance and then attach to the circle, leaving a few inches open for elastic insertion.  Finish the hem between casing and upper circle tier, except for the opening. 

Measure your girl's waist. Subtract 2 to 3 inches for stretch and cut that length of 3/4" or 1" elastic.

Or, use this handy elastic cutting guide.

Size 2 cut 16"
Size 4 cut 18"
Size 6 cut 19"
Size 8 cut 21"
Size 10 cut 22"
Size 12 cut 23"
Size 14 cut 24"

 Insert into the casing, pull all the way through, and then sew the casing closed.
Serge the now closed opening.


free skirt tutorial

 Voila! You have a very twirly circle skirt!


The skirt above is a size four.  Here's a size chart for other sizes. This accounts for a half inch seam allowance on all seams.

For sizes 2-15, cut waist casing 2.5 inches by measurement of inner circle.

For sizes 2-6, cut panels 36 inches long
For sizes 8-14, cut panels width of fabric. 


skirt size chart


Sunday, June 15, 2014

Flutter dress redo for 18" doll - free tutorial


This tutorial can be used to make other style's of doll dresses. This week, my 11 year old daughter made the version you see above. This was a birthday gift for her little sister's American Girl Caroline doll. Since little sister also got the AG sewing studio for a gift, I thought I would share the dress on our new 18" doll mannequin. 

To make the dress above, all you need is a few scraps of fabric.  Use the pattern measurements from the tutorial for the bodice and sub velvet or other ribbon for straps. Cut the straps about 3.5 inches long.  To make a full length skirt, you need two pieces of 10 inch by 10 inch fabric or one 10 inch by 20 inch (or thereabouts). Since you are using scraps, width can be a bit off and it will just make your skirt more or less full. We used two scraps I found that were both 5 inch by 20 inch.  She sewed them together and added the lace as a nice detail to cover the seam.  The back is elastic, just like the Mille Rose Flutter. 

Voila!  A new party dress for Caroline.  Made from lovely Jennifer Paganelli fabric.  Bodice is Beauty Queen and skirt is Honey Child.  See link in side bar for more fabulous Sisboom Fabrics from Jennifer!

The purse was also sewn by my daughter, for her sister. It's just a tiny scrap folded and sewn, velvet ribbon as strap.  

Giving kids scraps to sew is so much fun!


Monday, May 12, 2014

Baby Doll Mei Tai Carrier - free pattern and tutorial


baby doll carrier pattern

My daughter has been wanting a doll carrier for her baby. She has seen many pictures of me wearing her sister or herself and she knows that is a fun way to hold a baby.  My Ellaroo Mei Tai was my favorite carrier and I wanted to do something similar. They are so easy to use.  After much searching, I could not find a pattern or tutorial that had the shape I wanted. And, they all had difficult directions for sewing the straps in and turning right side out. So, I drew my own pattern, tested it out several times, and here we go. This baby carrier should work for any doll in the 14" to 18" range.


Baby mei tai carrier tutorial

Supplies

1.     One yard heavier fabric, such as home decorator fabric, corduroy, or bottom weight fabric. You can make this out of quilting cotton but you will need a heavier interfacing.
2.     One 8 ½ by 11 piece of interfacing.  For home deco fabric, I use a medium weight sew-in interfacing. If you are using quilting cotton, you will want to use something heavier, such as quilting batting.
3.     Decoration for pocket.


For all seams, use a 3/8” seam allowance unless otherwise indicated.


If you prefer to download and print your directions, here is a pdf for you.  Also, download pattern template here.  Please make sure the pattern paper is 8 and 1/2 X 11 inches. 


Steps

A.     Cut out your fabric.
a.     Use pattern template to cut out two pieces of main fabric and one piece of interfacing the same shape.
b.     Cut out two pockets
c.      Cut out three straps 42” by 6” (yes three)
d.     Cut out one piece of bias tape 1/5” X 6”

baby doll carrier pattern

B.     Carefully pin your interfacing to the inside main fabric and baste the two together.
C.     Cut one strap in half so you have two at  21” X 6” and two at 42” x 6.” Fold them in half lengthwise, wrong sides together, iron flat, and sew down the side seam. 
D.    Turn straps right side out.  I use my Dritz Tube Turners for this so I leave both ends open until this point.  Then, I iron flat, fold one end down neatly, and top-stitch each all the way around. 

baby doll carrier pattern

E.     Finish your pocket, if you are going to have decoration. I like ric rac so I sew it to one side first.  Sew pockets wrong sides together, around the curve. Turn right side out and iron flat.
F.      Finish your bias tape so it will fully enclose the top of the pocket and sew on.  I will leave this direction open so you can do it your own way.

baby doll carrier pattern

G.     Position pocket 3” down from top corner of front carrier piece and 1.5” from sides.  Sew in place by topstitching next to ric rac or edge. 

baby doll carrier pattern

H.    To sew the long straps on to the top, position them so the unfinished hems are even with angle cut at top of front piece.  Pin in place on reverse side and fold straps up so they do not touch sides of front carrier piece. 

baby doll carrier pattern

I.      Position shorter straps even with side seams (as shown in picture) and 1” up from bottom of carrier. Pin in place on reverse.  Fold straps so they are tucked neatly inside (as shown in picture).
baby doll carrier pattern

J.      Position back piece of carrier evenly over top of front piece WITH STRAPS INSIDE and pin in place. Make sure not to pin folded part of strap. You will be sewing straps in place where they meet edges.  I place my pins horizontally to help keep the carrier flat and remove them as I sew.  
baby doll carrier pattern

K.    Sew all the way around leaving 5 inches (give or take an inch) unfinished at bottom of carrier. USE ½” seam allowance for this step.
L.     Remove all pins and turn the carrier right sides out.  Iron with hot steam iron to get it to lay nice and flat.  Top stitch all the way around the main carrier, neatly finishing the bottom part.  


baby doll pattern tutorial

Safety Note:  This carrier is not designed for use with a real baby or animal. 


Now, how do you use it?  Here is my little model with step-by-step instructions.


baby doll mei tai tutorial


Thursday, May 8, 2014

Jennifer Paganelli Beauty Queen Twirly Skirt

free spirit beauty queen


Today, I am guest blogging over at Sew McCool showing you how to ruffle knit fabrics. 

However, I also want to share with you all this skirt I  made for my oldest daughter out of Jennifer Paganelli's lovely new fabric line, Beauty Queen. I am very lucky to be considered one of Jennifer's "lovelies" and she sent me this fabric as a preview of her line.  There were no strings attached with the gift but how could I not sew something up quickly and share about it when Beauty Queen has finally arrived in stores!  Thank you kindly Jennifer for sharing your lovely fabric with me!

I used my twirly skirt tutorial to create this skirt. This is a size 14 and I decided to add a three inch ruffle to the bottom for an extra pop of color.  Otherwise, this is the twirly skirt seen in my tutorial. I used Jennifer's Valerie in Yellow and Katie Stripe in Midnight to make this fun skirt. My daughter loves it and said the fabrics are beautiful.  Her little sister said this makes her look like a college girl.  That comment was too cute not to share. 


free spirit beauty queenfree spirit  beauty queen


free spirit beauty queen


You can find more of this beautiful line by clicking the SisBoom link in my side bar!

And you can buy some from my lovely friend Wei at One Red Blossom.  
She has it in stock NOW.  I already got more for me. Jennifer also sent me some Charlotte in green but I needed a bit more to finish the Sisboom Jenny tunic I am making for me. Look for that to be shared in the next week or two!  Such lovely lovely fabric. 


Monday, April 28, 2014

Tie Dye Diva Perfect Party Dress Blog Hop - Day 1


Today is day one of the Tie Dye Diva/ Handmade Dress Haven Perfect Party Dress Blog Hop! We have some great bloggers helping show off different ways to use the Perfect Party Dress pattern to make a stylish and classic little girl's dress. 

First, let me tell you about this pattern. It comes it two sizes, baby sizes 0-24 months and girl sizes 2 to 10 years.  The patterns are extremely well written and the sizing is very accurate to the size charts.  The directions are perfect. Jen, the Tie Dye Diva, is an excellent pattern writer.  And, for this week only, you can get these patterns for $6 each, instead of the usual $7.95.  You will see the discount once you put the patterns in your cart.  What a great deal!!

 I have made numerous versions of the girl size dress and love it!  You may recall my pleated-front version, which was featured on the SisBoom blog.  Today, I am going to show you how to do another variation of the bodice piece, this time with pintucks! I will also show you how to made a ruched sash instead of a flat one.  I showed this to you a few weeks ago, for Project Run and Play, but today I will actually tell you you can also get this great look. 


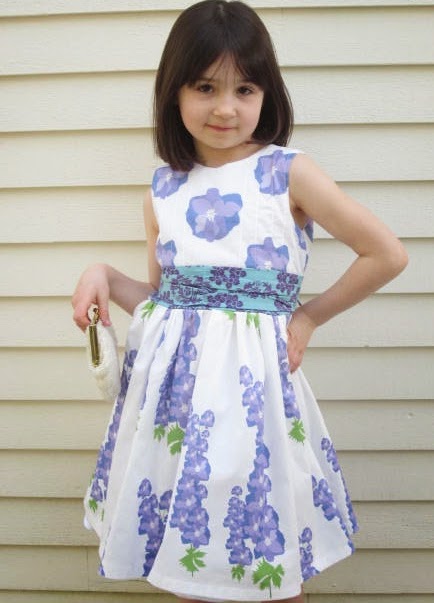
Here is the finished dress


And here is a closeup of the bodice and sash.  


Step 1 - Pin Tucks

1.  Cut out your bodice front pattern piece and then cut a piece of fabric out that is several inches larger on both sides.   This takes eye-balling but for my size 6X bodice I cut it 2 inches wider. Better to be too wide than too narrow.  I also cut the fabric about an inch higher on top and bottom.


2. Next,  in that extra inch on top and bottom, mark (with washable marker) dots every one inch.  I used my rule to make sure my dots line up on top and bottom.  Pin tucks are basically tiny pleats so you need them to line up perfectly.


3. For step three, use your fingers to squeeze the fabric together, making a small fold from one dot to the next (vertically). 


4. Place a pin horizontally to the tiny pleat to make a tuck.  Do this up and down your pleat. This is why they are called "pin tucks." You tuck fabric and pin it! Do one pleat/tuck at a time.
 

5.  One pleat/tuck at a time, use your top stitch foot or stitch in the ditch foot to sew a seam very close to the fold. If you do not have a special foot, just sew very close to the edge. 


6.  Repeat steps 3-5 for every inch. 


7.  You can pleat/tuck all the way across or, as I did, you can stop in the middle to show off the pretty flower.  Either way, when you are done, lay it all out and see how it looks. You now have pin tucks.
 

8. With your iron, use heat to angle the tucks towards the side seams.  Iron from middle to side. This just makes them lay nicely.


9. Use your bodice front pattern piece to cut out your bodice front!  Isn't it pretty!

Hint: If you want the entire bodice to have pin tucks, you might think about doing your first tuck in the exact middle and working out from there! Wouldn't that be sweet. 


Step 2  Ruched Sash

1.  Make a new pattern piece that is double the height of the one that comes with the pattern. 


2. Iron it such that you can see a line down the middle. 


 3.  Sew gathering stitches at either side of sash and in the middle (over the line you ironed). Use the gathering stitches to gather the sides and middle of the sash so they match the original sash pattern height. 


 4.  Don't worry if it makes the shape of a ladies swim top. It will look fine later!!


5.  Take it to the ironing table, use your hands to gather the rest, and iron it flat.  This will help it keep it's shape as we sew it to the bodice. 
 

6. Sew it to the bodice as Jen instructs in her Perfect Party Dress Pattern.
 

7. Sew the rest of the bodice parts together as Jen instructs in the Perfect Party Dress Pattern.  Stop when you get to adding the sash ties.  To add the sash ties, you will eye ball the sash side gathering and sew as much of it as you can into the sash ties. This will hold the gathers in place. Be sure to leave a bit at bottom so that the sash front lines up with bottom of lining.  The three photos below show you how I did this step.

This might seem complicated. Contact me if you have any questions!  


8. Follow Jen's directions to complete the Perfect Party Dress pattern! 


Voila!


Please visit Amy and Michelle's blogs for their versions of the Perfect Party Dress! 

April 28 Kathy, Amy, Michelle


And visit the rest of the hoppers all this week!
 
 
April 29 Tasha, Ren and Alyssa
April 30 Sara Beth, Shelly, and Shawnta
May 1 Jenny, Meriel, Victoria, Nichole
May 2 Deanna, Zura, Kim


HTML Map