Tuesday, October 29, 2013

Millie's Flutter dress and the challenge of what to wear to school


Earlier this summer, I had the pleasure of pattern testing for my friend Melissa of Millie Rose patterns.   Her Flutter dress is a pure confection, so frilly and pretty. I love it! 

 More recently, I have taken the pattern and made it some minor changes to it. I love to personalize patterns in this way, to make them fit either my vision or that of my daughter of both.  The first new version was made as a dress-up dress for my 6 year old daughter.  She is very sensitive to seams and fabrics and wanted something that was comfortable. Most store-bought dress-up dresses are not comfy, so this was made to be super comfy. All the seams are contained and the fabric is quilting cotton. The pink unicorns are from Timeless Treasures and the skirt fabric is Michael Miller, from the Fairy Frost line. It is hard to see in the photos, but these fabrics sparkle! 


 She wanted a long skirt but one that ruffled up in the front, for easy walking.  To make the skirt, I just played around with making two curved front pieces, with ruffle attached, and used them as the the front part of the skirt.   I made the whole dress a size larger than she usually wears so it will last a long time. She can wear it with a t-shirt underneath.


More recently, I used the pattern again, this time for a halloween dress. The inspiration for this dress comes from the very talented Jeannine at Kinder Kouture. Her Cinnamon Avalon dress is so pretty! And everything she makes is lovely!  It is also made from the Millie's Flutter pattern, but with a pretty, faux bow in front. 


I winged it on the bow and it turned out pretty cute! I got this cute fabric off ebay and then used scraps from my stash for the rest.  I had just enough of each for what you see.  It is very long, which she usually likes, but apparently it is too long for school. So, it will be shortened and, hopefully, worn to school tomorrow. Again, it is a is bigger so she can wear it longer.  


Elwood had to get into the picture! He's our super friendly kitty.  She's not pulling his tail.  She was just petting it! He will let you pet every single part of him, he is so easy going.


Thursday, October 24, 2013

Blogging mojo and the Knottygirl Boho


 It's been a while since I blogged last! I lost my mojo. A lot of personal stuff overtook me, from being sick myself to having sick kids to being busy with the kids' school and more.  And I just couldn't find it in me to write a post. 

But I am back! And I have a lot of sewing to share!

*********************************************************

First up, I finished up a special project.  Last May, a friend I made online, Carole, passed away from TTP (Thrombotic Thrombocytopenic Purpura). I do not begin to understand what that means except that it was pretty sudden. Carole was a fun online friend and I knew her from sharing a love of the same girl's clothing brands and for sewing. She was in my Facebook sewing group and we chatted often via personal message. She was a fun gal.  Her death left a hole in my heart.  

When she died, she left behind a burgeoning sewing business called  Kook's Closet. Kook was the nickname her grandkids gave to her.  She also left behind a stash of fabric.  I offered to help her grownup daughters identify and sell the fabric and ended up getting involved in making them some special items from their mother's fabric.

Here are the Knottygirl Boho hobo bags I made from some of their mother's fabric and some of mine.  First of all, if you are not familiar with this Red Label Patterns bag pattern, it is great!  It is a lot of fun to make and use. Heather, the designer, did a great job making this pdf pattern simple to use and read. It has a lot of pictures and easy-to-follow instructions. I highly recommend it. I have made, as of now, four large bags and one small. Fun stuff!


First up, this teal and red beauty.  I was sent the florals and added the dots and stripes.  The white ribbon was my touch and, as you can see above, the girls sent me their mom's tags to add as a final, loving touch.  The bag is 19.5" x 15" x 6.5" in size. 


Full view
 

Inside has four pockets!


This orange and blue on is going to be a diaper bag for a baby boy.  If you cannot tell, this is Goodnight Moon fabric. I added the orange straps and the inside pocket fabrics. 


Inside


Closeup


And here is the one I made for me! They sent me some fabric, too, of my choice and I chose this lovely kitty fabric from Alexander Henry.  I added some Moda PB&J fabric and had some fun with it. 
 

Closeup of details. 
 

Pocket. I played with some fancy stitches. 
 

Inside


Last, but not least, the final bag I made for the girls.  I was sent the blue and yellow fabrics and added in the blues. 


They also sent me some custom Kook's Closet buttons, which I sewed on each bag. Such a sweet touch. 

This was a fun and sweet project.  RIP Carole


Tuesday, September 10, 2013

Tie Dye Diva Long Sleeve Top


 Jen at Tie Dye Diva has done it again! Another great pattern!  


 I love her patterns and feel very fortunate to be her friend and be part of her process, albeit simply as a pattern tester.  This adorable top top pattern for girls can be made with a Peter Pan collar, squared-off 'split collar', no-collar square neckline or no-collar round neckline. It has so many style!  And, there is no buttonhole needed. It has a button-and-loop back closure.  The yoke is lined. So well designed!! As usual. 

I chose to test this pattern out in Robert Kaufman fine wale Cool Cords. I have a thing for this fabric group and have amassed a small collection!  First up, the Peter Pan collar. This was a great pattern to test and I had a lot of fun with it.  As usual with TDD patterns, it was well written, with clear instructions and great pattern pieces. 


 The back has two loops for button closures. My daughter chose these teacup buttons.

  
The collar lies perfectly!  I like the spacing between the back pieces, as you can see below.  It looks very clean and neat. The way the pattern is written, the back yoke lies perfect! Doesn't it look nice!!


I also made it in a square neck style, again in Cool Cords. I made this one a tad large so it will be something my daughter can wear longer.  This one has a matching skirt made from an Ottobre pattern, from issue 6/2009.


Great Pattern Jen!!!


PS:  Don't forget the fabric giveaway!!


Monday, September 9, 2013

Fabric Giveaway!

After a great summer off from blogging, I am back and want to connect with more of you. So, I am having a small giveway to entice more of you to follow me. I hope you like it!


I will choose two winners, one for each item. 

Please note the Facebook page must reach 300 likes for item #2 to be part of the giveaway!

First item to be given away is a two yard set of Art Gallery Modernology fabrics.  This is four one half yard cuts of each of these lovely fabrics. Two yards in all!


Second item is the very hard to find Michael Miller Lava Blooms fabric in SAGE green. This is not apple green.  This is Sage green. See the pink flowers. Apple green has dark pink flowers.  This is enough to make a bodice for a small girl or maybe sleeves for several dresses. Almost impossible to find!! 

This item will not be included in the giveaway unless I reach 300 fans on my Facebook page, so please refer friends! The refer-a-friend option is only available for paying Rafflecopter customers, of which I am not, so I have to ask you pretty please to do this on your own!  Thanks a million!! Maybe some day I will generate enough buzz to warrant paying for more Rafflecopter choices!!


a Rafflecopter giveaway


Isn't this fun!  This giveaway Tuesday September 17th and I will share the winners on Wednesday the 18th.  Have fun and please refer some friends!! 


Jocole Crossover tunic tops for my tween


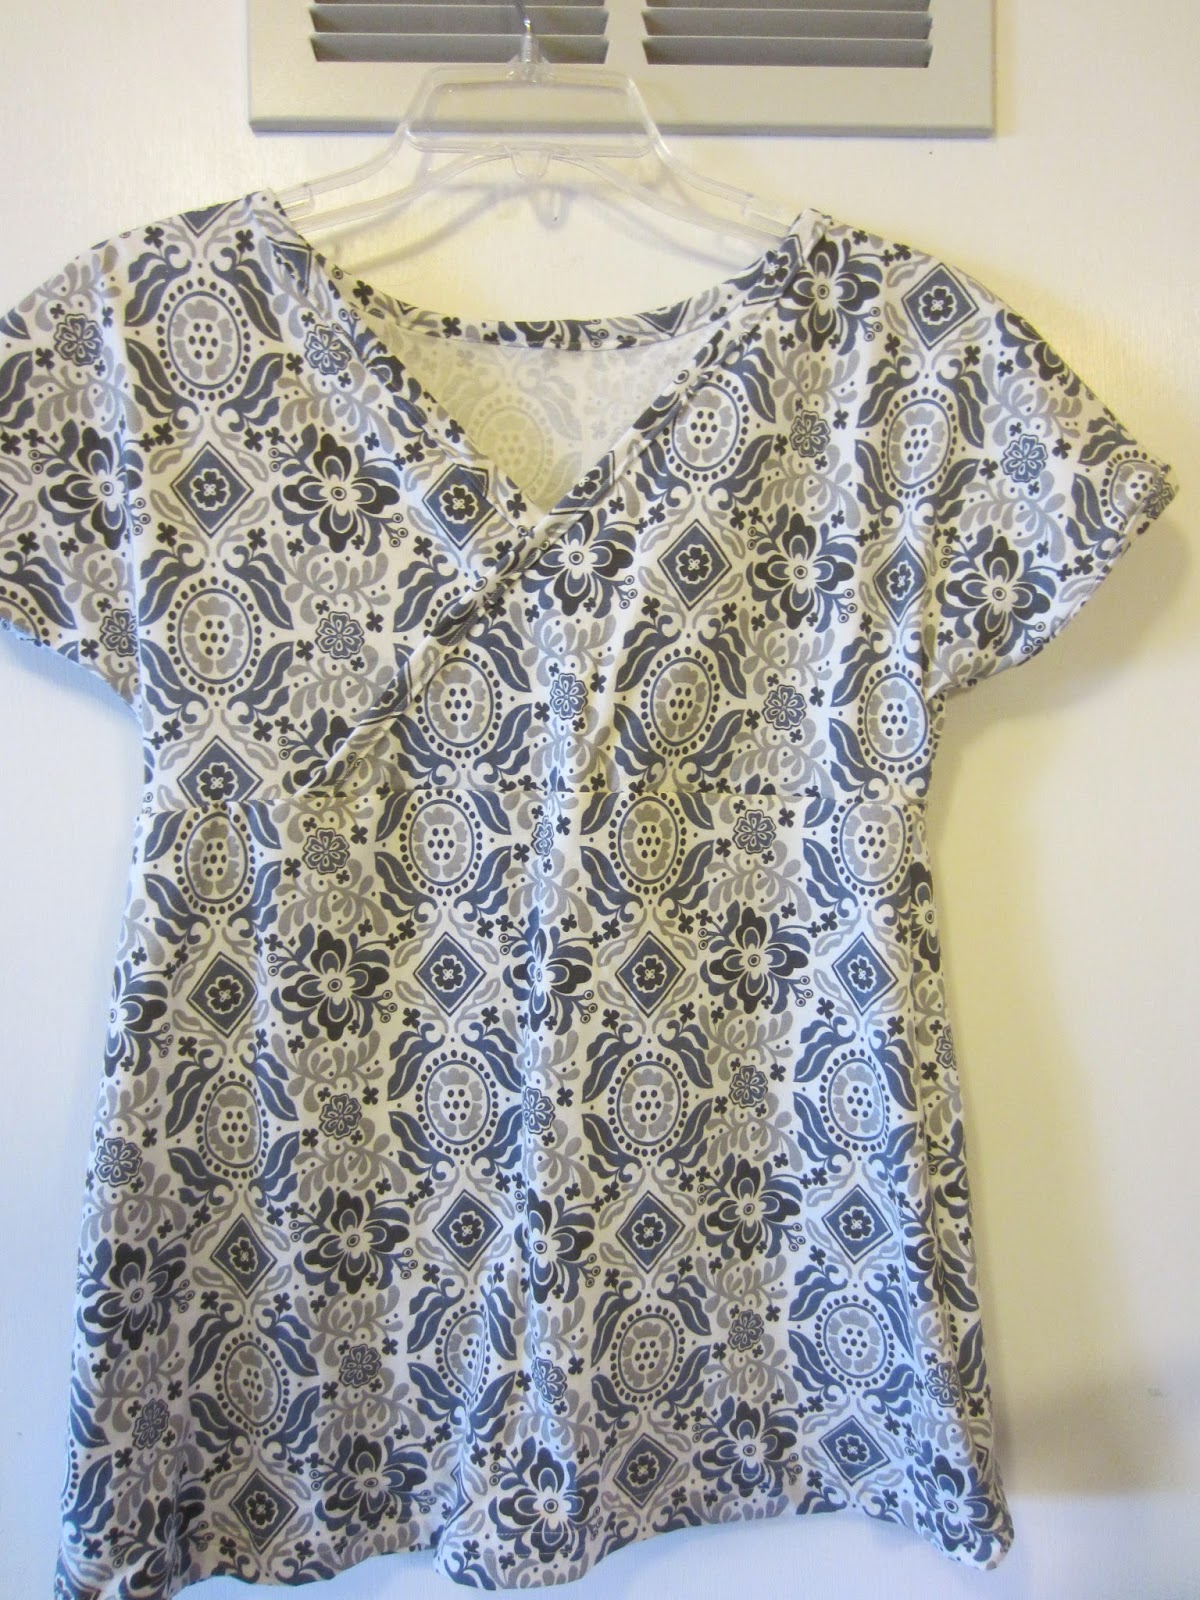
 One of my favorite patterns to sew for my tweenage daughter is Jocole's Crossover Tunic.  It can be a top, tunic or dress and the pattern comes in 12 month size thru size 14, including an 18" doll version! You can also buy it in the woman's size, if you need it larger.  It is a versatile, well-written pattern.  If you are afraid of sewing with cotton knit fabric, this pattern is one to try because it is not too hard at all.  The binding around the neckline took me a few tries to master but that isn't bad.  The three tops, shown below, are my 4th-6th attempts at this pattern and I think I am getting pretty good at it! 


The above two tops are made from fabric I got from Banberry Place Fabrics. Corie runs an excellent store and has the best selection if cotton knit fabrics as well as wovens and notions and patterns. She will also sell you fabric samples, five for $2.50, which helped us pick out those two fabrics, among others. It really helped my daughter to be able to see the fabric in person and feel it.


The fabric for this tunic, as modelled by it's new owner, is a lovely Valori Wells print for Free Spirit fabrics that I got from One Red Blossom Fabrics.  We are really enjoying this line of knits that Valori designs.  They are soft and very pretty and easy to sew with.  I made several tunics from last year's line and they were much loved.


Want to know more about Jodi, the designer from Jocole? Check out my interview with her. She's a great lady, very talented.

Also, check out the tutorial I wrote to make headbands from the leftover knit fabric.

Finally, please visit my Pinterest page for some awesome linked tutorials on how to sew with knit fabric. Don't be afraid to try! 


Tuesday, September 3, 2013

Cotton/lycra Knit headband tutorial


Around these parts, my girls love to wear soft headbands. They both have long hair and the soft headbands are a much more comfortable solution to hair control than the hard plastic or metal ones.  We can buy a Scunci brand pack of them at the mall for a few  bucks but it is much more fun to have them match one's clothing! Since I made some cotton knit tops for my oldest daughter to wear to school, I decided to make some headbands to match.  I was very surprised to find not one tutorial on how to do this simple project, so I made one.  Tomorrow, I will share the tops these cuties match.  For now, enjoy the tutorial. This is a great way to use your knit scraps.


 The finished project will look like this one, above. You are going to want to use cotton knit fabric with stretch to it. My fabrics are all part lycra and have good stretch and release. It is hard for me to tell you exactly what fabrics to buy but if they have some lycra and they stretch out and back and still look nice, you will be fine.  

You will also need a ball point sewing machine needle for this project.


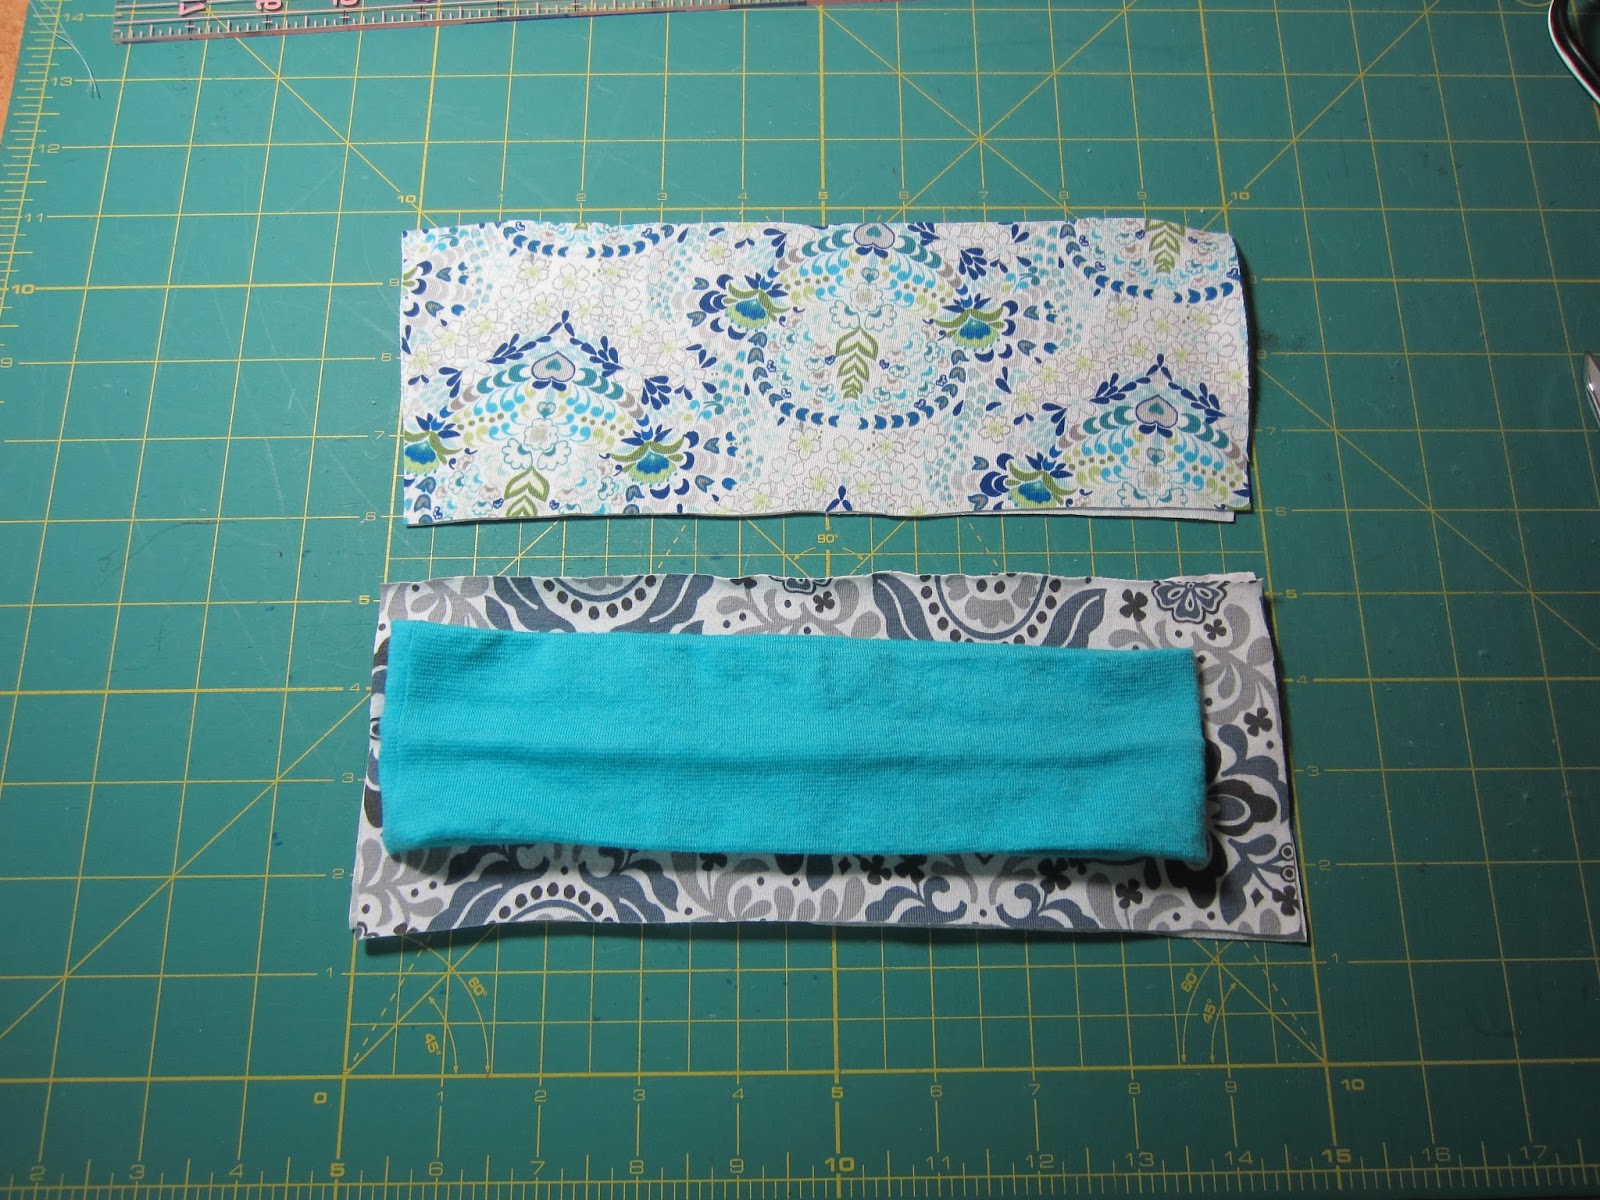
 1.  Our store-bought headbands are 9 inches long by 2.5 inches. We will be making 9 by 1.5 inch headbands. You can make yours any width you want. If you have a very young child, you might want to shorter the length.

 2. Cut out two rectangles per headband. 
Each rectangle should be 10 inches by 4 inches.  I like to wing it on the seam allowance for things like this but if you like exact, then use a 1/2 inch seam allowance.

 3. Right sides together, sew one end together on each headband.  


 Note: use stretch stitch or tight zig zag. 
I am pointing to stretch stitch on my machine. 
It looks like a lightning bolt. This stitch will give
your knit fabric some stretch but still have a tight seam.  
A straight stitch might pop when your child uses her headband.

 4. Fold in half length-wise and sew the length, right sides still together.  
You should now have one long tube. 

 5. What do you use to turn tubes right side out? I use my Dritz Tube Turner! 
(I wish that was a sponsored comment, but it is not! I just love this doohickey!)

 Here's how it works. 
You stick the tube in, use dowel to push a bit of fabric inside and then 

 you stand it up and pull fabric down. 

 Voila! Right side out tube!

6. You now have a 19 inch tube. 


7.  Take one side of your tube and fold fabric in 1/2 inch. 
See both pics above for how that looks. 

 
 8.  Stick the other end 1/2 inch inside the tube. 
You now have one side folded in 1/2 inch and the other side laying in the tube 1/2 inch. 

 9.  Sew a 1/2 inch square to contain this end.  
Your headband is done!  


 10. Yay! You now have some nice headbands to match your handsewn clothing!

Tomorrow, I will share some of the clothing I made with the above fabrics and I will also let you know about the giveaway I am doing! I will be giving away some hard to find fabric!   I've also been pattern testing and cannot wait to share about that!